How to Prepare Your Chimney for Winter: A Complete Homeowner's Guide
Why Winter Chimney Prep Can’t Wait
Skipping chimney winter preparation is one of the most common — and most dangerous — oversights St. Louis homeowners make. According to the Chimney Safety Institute of America (CSIA), approximately 25,000 chimney fires occur in the United States each year, and creosote buildup is the primary cause of every one of them.
The National Fire Protection Association reports that failure to clean chimneys and flues was a factor in 68% of home structure fires involving fireplaces, chimneys, or chimney connectors [NFPA-001]. That’s not a freak accident statistic — it’s a maintenance failure statistic.
Missouri winters hit hard. From the northern suburbs to the metro areas surrounding St. Louis, homeowners across the region fire up their fireplaces the moment temperatures drop, often without thinking about what’s sitting inside that flue after months of sitting dormant. A summer’s worth of moisture, debris, and animal intrusion can turn a perfectly functional chimney into a fire hazard before you’ve burned your first log of the season.
The good news: we’ve handled this same prep work hundreds of times, and we know exactly what needs to happen. This guide walks you through every step — from scheduling your chimney inspection to checking your masonry before the freeze-thaw cycle takes hold.
Start With a Professional Chimney Inspection
A professional chimney inspection is the single most important step in chimney winter preparation — and it must come before any other work. NFPA 211 calls for annual inspection of all chimneys, fireplaces, and vents, covering soundness, freedom from deposits, and correct clearances. This applies to wood-burning, gas, and oil appliances alike.
The CSIA defines three inspection levels — and knowing which one you need matters:
- Level 1 — A standard annual inspection for chimneys in continuous use with no changes. The technician visually examines all accessible areas.
- Level 2 — Required after a chimney fire, home sale, fuel change, or any unusual event. Includes video scanning of the flue liner.
- Level 3 — Reserved for suspected concealed structural damage. Involves partial demolition to access hidden areas.
For most homeowners doing routine fall prep, a Level 1 inspection is what you need. But if you had a chimney fire last season — even a small one you barely noticed — a Level 2 inspection is called for before resuming use.
Not sure which level applies to your situation? Our post on chimney inspection levels explained breaks it down.
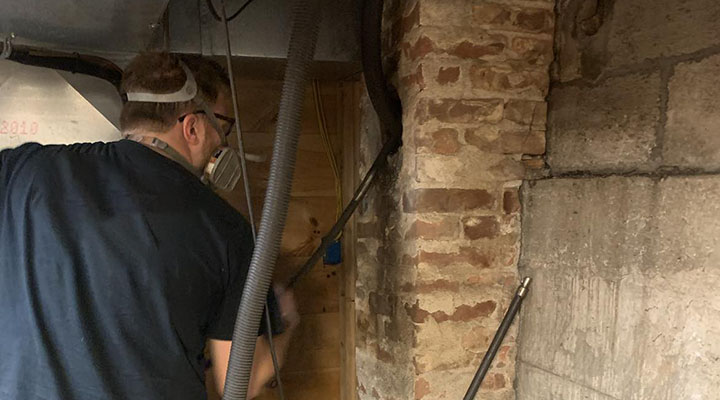
Schedule Professional Chimney Sweeping
A chimney sweep removes the creosote, soot, and debris that accumulate in your flue — the deposits that cause chimney fires. Don’t delay this. Our chimney sweeping service is one of the most direct ways to reduce your fire risk before winter arrives.
Creosote exists in three distinct stages, and the stage matters enormously:
- Stage 1 — Light, flaky soot. Easy to brush away. Low risk.
- Stage 2 — Dense, shiny, tar-like coating. Harder to remove. Moderate risk.
- Stage 3 — Thick, hardened, glazed deposits. Extremely difficult to remove. Stage 3 creosote can auto-ignite at temperatures as low as 451°F — well within the range of a normal fire.
Once Stage 3 creosote takes hold, standard brushing won’t remove it. We may need specialized chemical treatments or rotary tools. That’s why annual sweeping before Stage 2 progresses is so much less expensive — and less dangerous — than waiting.
Our complete guide to creosote buildup explains exactly how these stages develop and what your sweep should be doing at each stage.
Inspect Your Masonry Before the First Freeze
Masonry damage you ignore in fall becomes serious structural damage by spring — and Missouri winters give it every opportunity to get worse. Water expands by approximately 9% when it freezes. When that expansion happens inside a crack in your chimney mortar or crown, it forces the gap wider with each freeze-thaw cycle.
St. Louis winters deliver exactly this kind of repeated freezing. A small crack in October can become a crumbling mortar joint or a broken chimney crown by February. Here’s what we look for before the cold sets in:
- Spalling bricks — Bricks that are flaking, chipping, or breaking apart
- Cracked or missing mortar joints — Gaps between bricks that allow water infiltration
- Damaged chimney crown — The concrete cap at the top of the chimney that seals out moisture
- Efflorescence — White staining on the chimney exterior, a sign of water intrusion
If you spot any of these, don’t wait. Our masonry repair service addresses tuckpointing, crown repair, and waterproofing before winter damage compounds. For a deeper look at what these warning signs mean, read our post on signs your chimney needs repair.
Check Your Chimney Cap, Damper, and Flue Liner
Three components — the chimney cap, damper, and flue liner — are your chimney’s first line of defense against fire, moisture, and carbon monoxide. A failure in any one of them can turn a routine fire into a dangerous situation.
Chimney Cap
The chimney cap sits at the very top of your flue and serves two critical functions: keeping rain and debris out, and preventing animals from nesting inside. Properly designed caps and spark arrestors must allow exhaust gases to escape while blocking unwanted entry. Animal intrusion and debris accumulation are common causes of chimney blockage regardless of fuel type. A missing or damaged cap is an open invitation for birds, squirrels, and raccoons to set up a nest directly in your flue.
Damper
Your damper controls airflow between the firebox and the flue. When the fireplace isn’t in use, a properly sealing damper prevents warm air from escaping your home and cold drafts from entering. A warped, rusted, or broken damper costs you money every day in lost heating efficiency. Test yours before winter: open and close it manually. It should move smoothly and seal completely.
Flue Liner
The flue liner contains combustion gases and protects your home’s structure from heat transfer. NFPA 211 is clear that damaged or deteriorated liners must be addressed before continued use. Cracks in a clay tile liner can allow carbon monoxide and heat to escape into the surrounding structure — a hidden danger that develops silently.
Use the Right Wood — It Changes Everything
The wood you burn is just as important as the chimney you burn it in. Burning wet or green wood is one of the fastest ways to accelerate creosote buildup, and it’s a mistake we see homeowners make without realizing it.
Green, unseasoned wood contains 40–60% moisture content. That moisture has to evaporate before combustion can occur, which produces cooler, smokier fires. Cooler flue gases condense on the liner walls, depositing creosote at an accelerated rate.
Properly seasoned firewood should have moisture content below 20%. The difference in creosote production between green and seasoned wood is dramatic. Here’s how to choose and use firewood correctly:
- Buy hardwood — Oak, hickory, and maple burn hotter and longer than softwoods.
- Check moisture content — Use an inexpensive moisture meter before burning.
- Season your own wood — Split and stack wood in a dry, well-ventilated area for at least 6–12 months before burning.
- Never burn treated wood, painted wood, or cardboard — These produce toxic emissions and accelerated deposits.
- Build hot fires — Smoldering, low-heat fires produce far more creosote than hot, efficient burns.
For the full picture on burning habits and creosote, our guide on how often to get your chimney swept explains how fuel type and burning frequency affect your maintenance schedule.
Install and Test Carbon Monoxide Detectors
A blocked or damaged flue doesn’t just risk a chimney fire — it risks carbon monoxide poisoning. And CO gives you no warning without a working detector. Carbon monoxide is a colorless, odorless gas that cannot be detected without a functioning CO detector.
The Centers for Disease Control and Prevention (CDC) reports that more than 400 Americans die from unintentional carbon monoxide poisoning every year, and more than 100,000 visit the emergency room. Many of these cases involve faulty or improperly maintained heating appliances.
The Consumer Product Safety Commission (CPSC) recommends CO detectors on every level of any home with gas appliances. For homes with wood-burning fireplaces or stoves, detectors are equally critical — a partial flue blockage can divert CO into living areas without any visible smoke.
Before winter, do all of the following:
- Test every CO detector in your home by pressing the test button
- Replace batteries in all detectors — even hardwired units with battery backup
- Replace any detector older than 7–10 years (sensors degrade over time)
- Install a detector within 10 feet of every sleeping area
This step costs almost nothing. Skipping it can cost everything.
Consider a Fireplace Insert for Better Efficiency
If your open fireplace is losing most of its heat up the chimney, a fireplace insert can transform it into a genuinely efficient heating source. The EPA estimates that most traditional open fireplaces lose over 90% of the fire’s heat straight up the flue, with the strong draft actually pulling warm air from other rooms along with it.
EPA-certified wood-burning fireplace inserts operate at 60 to 80% efficiency — a dramatic improvement over a traditional open hearth. For St. Louis homeowners throughout the region who rely on their fireplace as a meaningful heat source, the efficiency difference is real money back in your pocket every winter.
Our fireplace inserts service page covers the options available and what installation involves. And if you’re wondering whether the investment pays off at resale, our post on how fireplaces and inserts increase home value has the data.
Schedule Your Chimney Winter Preparation Today
Every week you wait is a week closer to heating season with an uninspected chimney — and the consequences of a chimney fire or carbon monoxide leak aren’t worth the delay. We serve homeowners throughout the greater St. Louis metro area and surrounding communities.
We’re licensed and insured, and we donate a portion of our revenue to charity. If you’re active military, a first responder, on a fixed income, or represent a non-profit organization, ask about our 10% discount.
Call us today at (314) 322-7122 to schedule your chimney inspection, sweeping, or masonry evaluation before heating season demand fills our calendar. For homeowners who take chimney safety seriously, there’s no better time than right now.

Joshua Scalf
Owner, Friendly Fire LLC
Joshua Scalf is the owner and lead technician at Friendly Fire LLC, bringing over 6 years of chimney service expertise to the greater St. Louis area.
Frequently Asked Questions
When should I prepare my chimney for winter?
Do I really need a chimney inspection every year?
How much does chimney winter preparation cost — is it worth it?
Can I clean my chimney myself to save money?
Do gas fireplaces in the St. Louis area need winter preparation too?
Need Chimney Service?
Don't wait until a small problem becomes an expensive repair. Friendly Fire serves the greater St. Louis area with honest, affordable chimney services.
Licensed & insured · 10% donated to charity · Military & first responder discounts
Related Articles
Creosote Buildup: What Every Homeowner Should Know
Creosote buildup causes thousands of chimney fires every year. Learn the 3 stages, what causes it, and how to protect your home before it's too late.
Tuckpointing vs Repointing: What's the Difference and Which Does Your Chimney Need?
Confusing tuckpointing and repointing could cost you thousands in chimney damage. Learn the real difference and which repair your St. Louis home actually needs.
Chimney Inspection Levels Explained: Level 1, 2, and 3
Don't guess which chimney inspection you need. Learn the difference between Level 1, 2, and 3 inspections—and what you risk by skipping the right one.